Australian Phone Windows VoIP Client Configuration
- Before configuration, you need to have an active account with us.
- Make sure, that you have downloaded and installed the AusPhone VoIP application on your PC, please see below the link
- Download from here: Download Windows VoIP client
- Install this application on your computer, by double-clicking the downloaded file.
Please check here how to configure for Residential VoIP
- Check your device credentials via MY ACCOUNT > Personal details > Devices
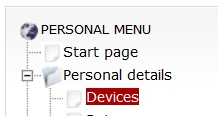
- Your login/password are coming from MY ACCOUNT portal > Personal details > Devices:

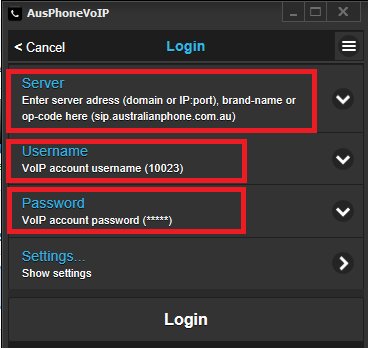
- You must define next details into AusPhone VoIP:
- Server: sip.australianphone.com.au
- Username: match Username from your account (10023 in case of example)
- Password: match password from your account.
- Rests of configuration please leave as is, no changes required. Please refer to picture below.
- Click Login and your application is ready in a few seconds.
- Make a free 09002 test call
Please check here how to configure for Cloud PBX
- Login into your Cloud PBX
- Make sure that you have a spare Softphone device available
- If you need create a new device - check here: How to Create Device in Cloud PBX
- Navigate to Devices, click on "Tool" on the right to see Device Credentials
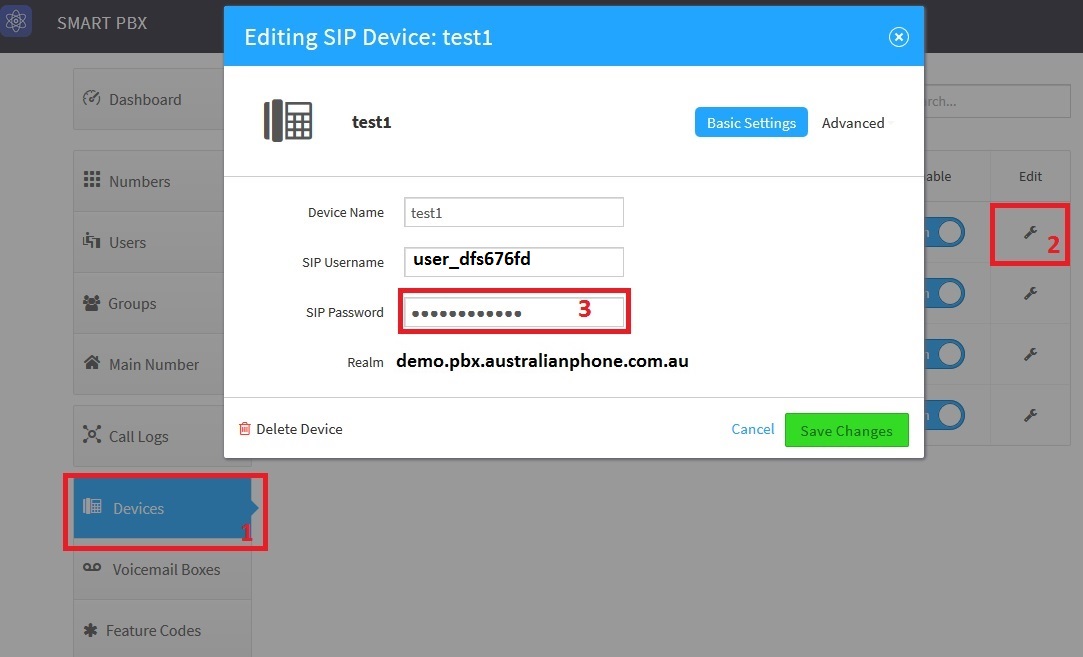
- You need to get from here: SIP Username, SIP Password, Realm:
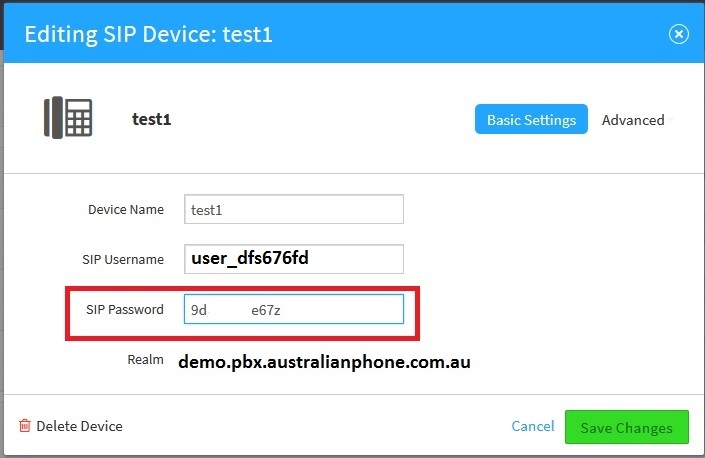
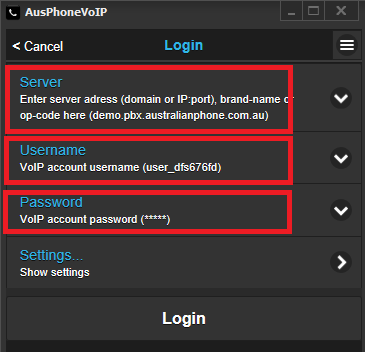
- Now, you need to enter these settings into AusPhone VoIP:
- Server: Enter Realm value from your device settings. (demo.pbx.australianphone.com.au in example)
- Username: match SIP Username from your device(user_dfs676fd in example)
- Password: match SIP Password from your Device settings.
- Rests of configuration please leave as is, no changes required. Please refer to picture below.
- Click Login and your application is ready in a few seconds.
- Make a free 09002 test call
