How to set customised call recordings in Cloud PBX


Cloud PBX users may use two types of call recordings (Record Voice Conversations into audio files to store them for quality and coaching services):
- We provide storage - That is maximum 1GB of storage per account for $5 of the additional cost. Only outbound external calls for all users are recorded. Please contact us on This email address is being protected from spambots. You need JavaScript enabled to view it. to enable this storage. No additional settings are required from your side. Recordings are available for download from the Billing/Accounting portal.
- You use your own storage (with Amazon S3 services). That is FREE of charge from us, however, Amazon may charge you later. As part of the AWS Free Usage Tier, you can get started with Amazon S3 for free. Upon sign-up, new AWS customers receive 5 GB of Amazon S3 storage in the Standard Storage class, 20,000 Get Requests, 2,000 Put Requests, and 15 GB of data transfer out each month for one year.
Please see Amazon S3 Pricing here: https://aws.amazon.com/s3/pricing/
How to setup Amazon S3 services to work with Cloud PBX:
1. Register an account with Amazon S3 from here: https://aws.amazon.com/s3/ use "Get Started with Amazon S3"
2. Once account created login into AWS Services console, select S3 service under "Storage"
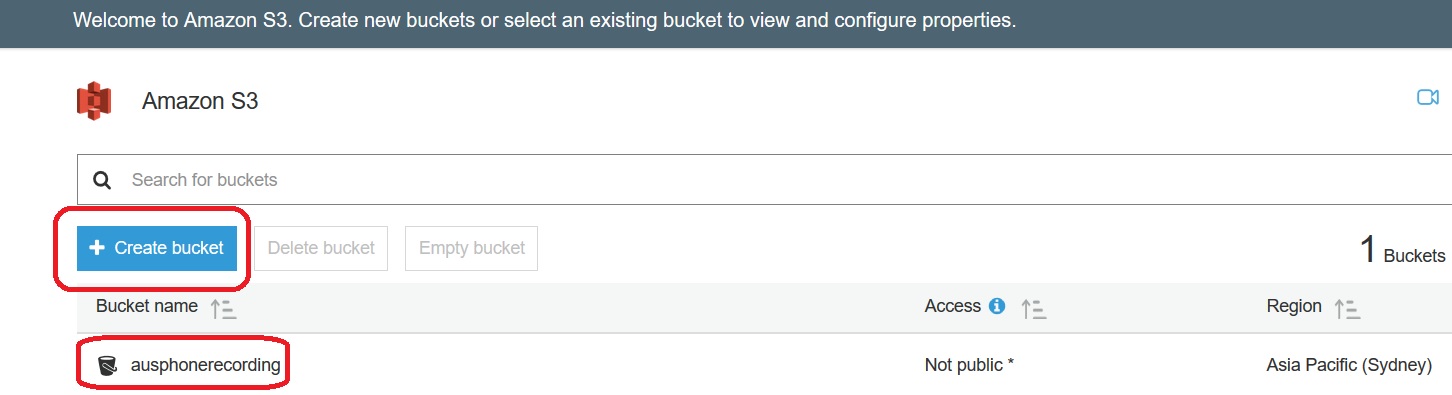
3. Click: + Create Bucket and create new Bucket. We advise to use Asia Pacific (Sydney) region for better performance (please write down an exact bucket name, you will need it):
4. Navigate to Services, select IAM service
5. Navigate to Groups, select "Create New Group"
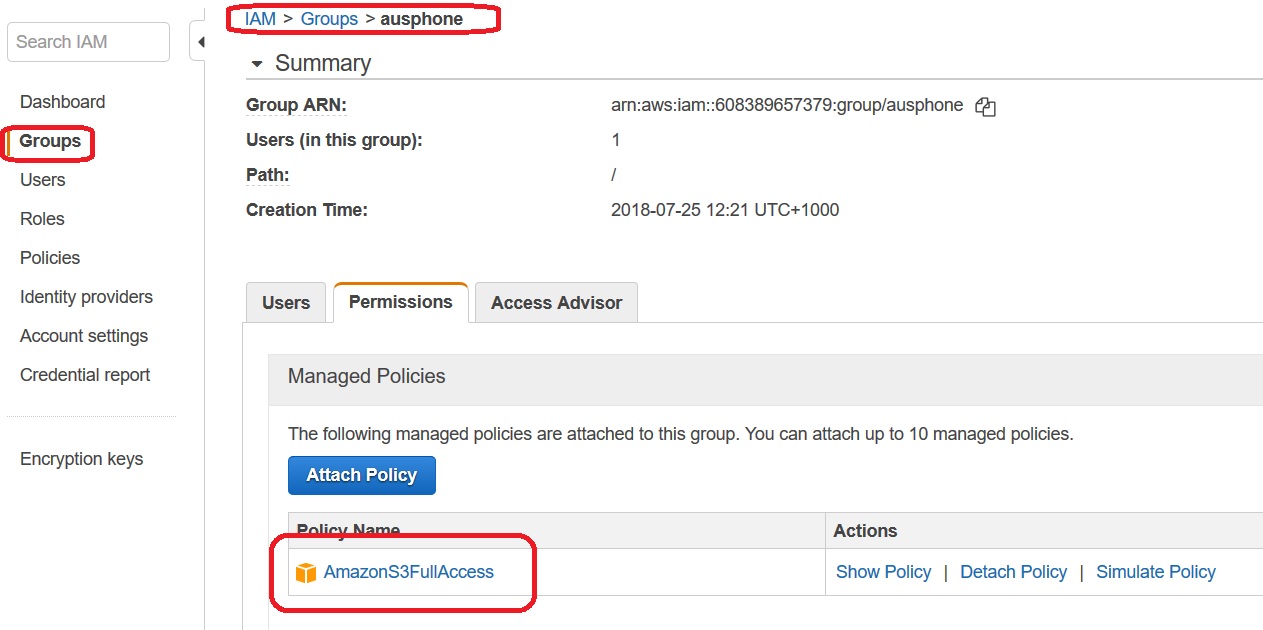
6. Create a Group with "AmazonS3FullAccess" policy:
7. Navigate to "Users", Click "Add user"
8. Make some user's name and select "Programmatic access"
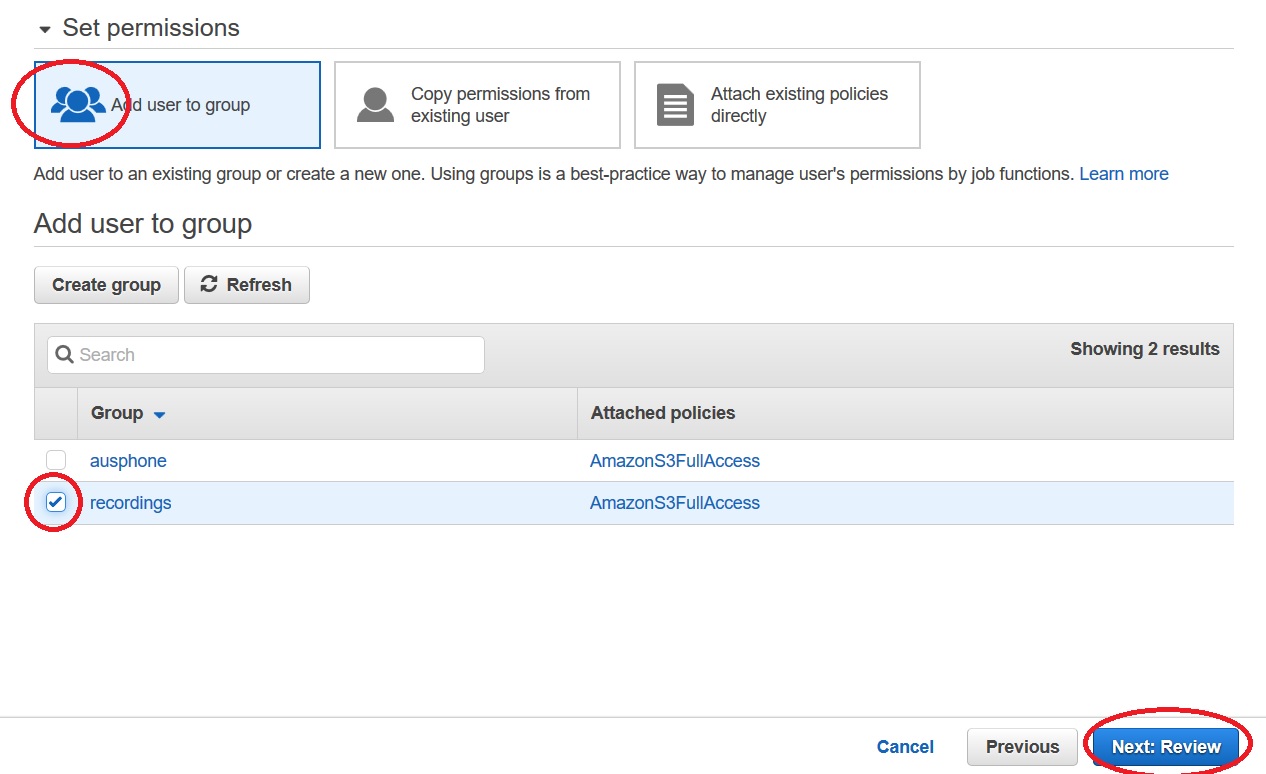
9. Click "Add user to group", tick Group that you created in the previous step and click "Review"
10. Click "Create user"
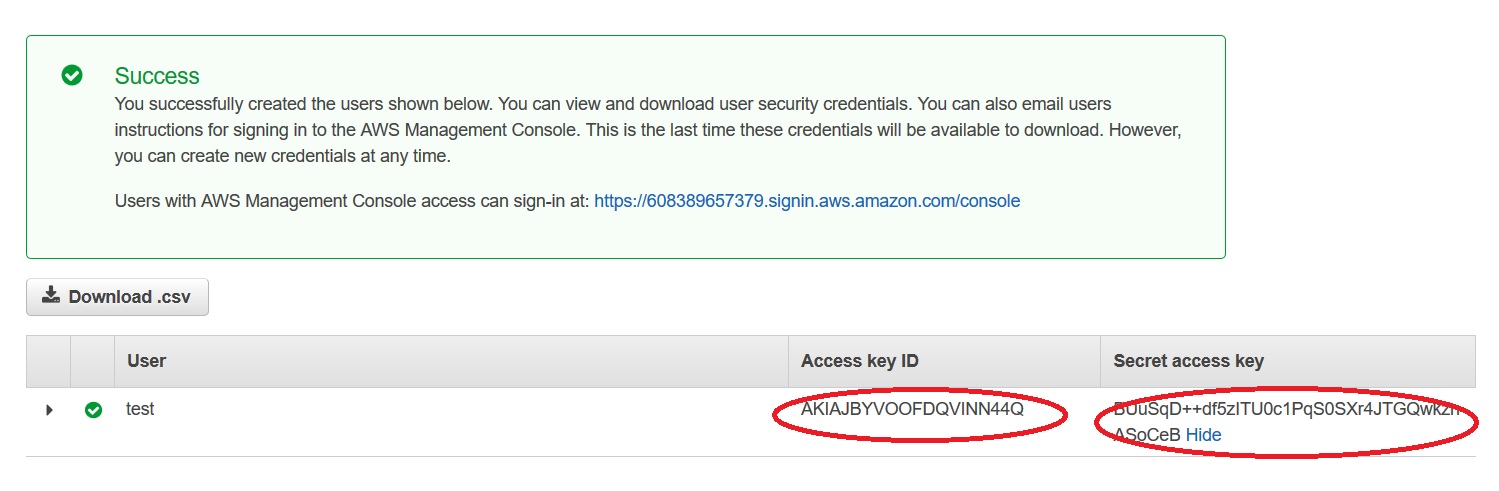
11. Once the user created - copy "Access key ID" and "Secret access key" for the created user. Do it before click "Close", you will not be able to access to Secret key any more once user created.
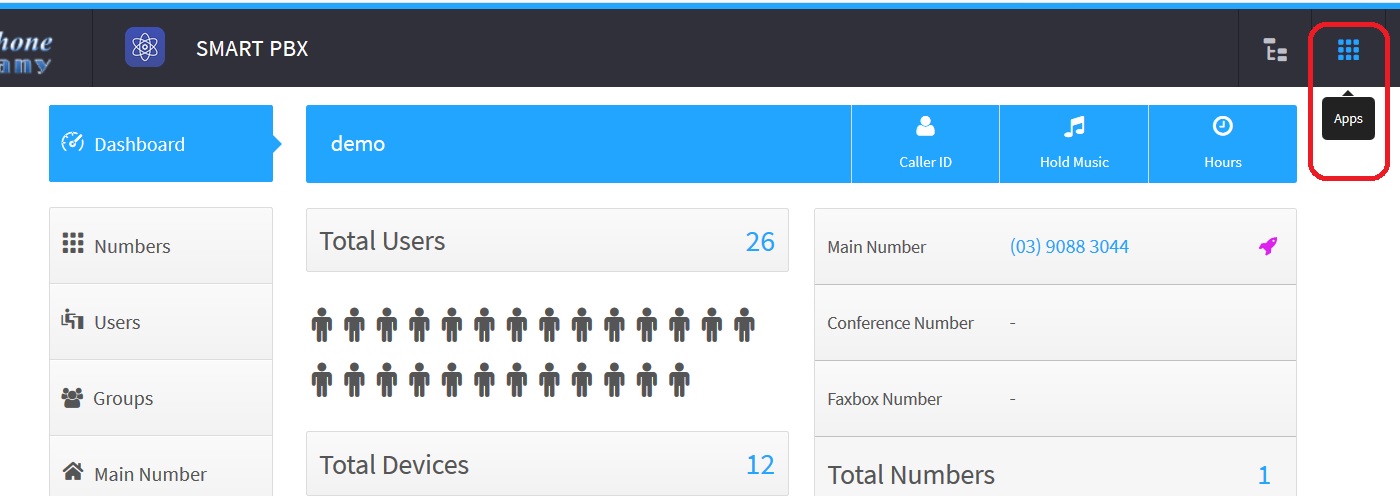
12. Now, open your "Cloud PBX" portal, click on the top right on the dotted square box and select "Storage" application. You may need to enable it in App Exchange on the same page if you cannot see this app.
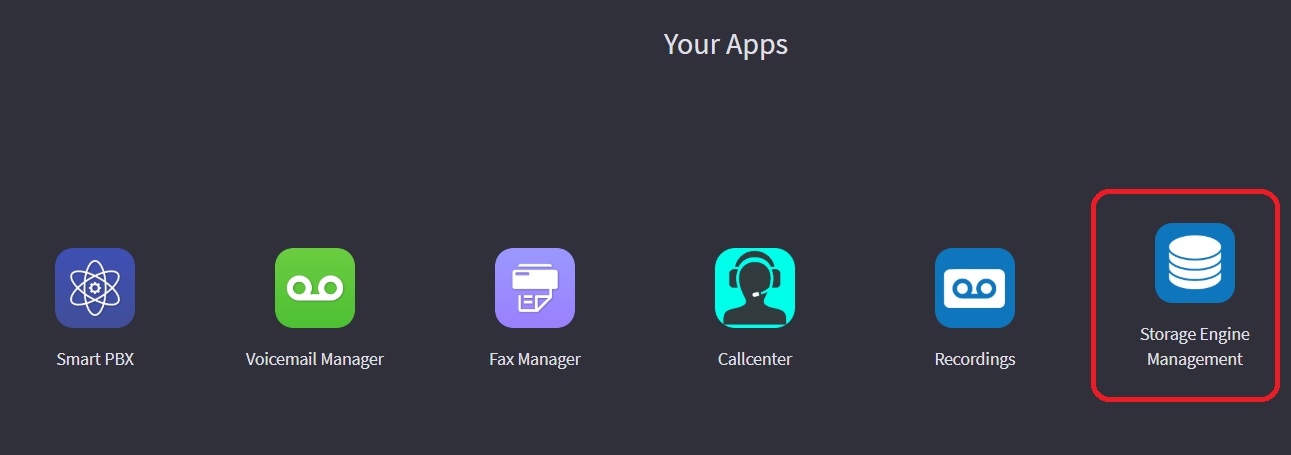
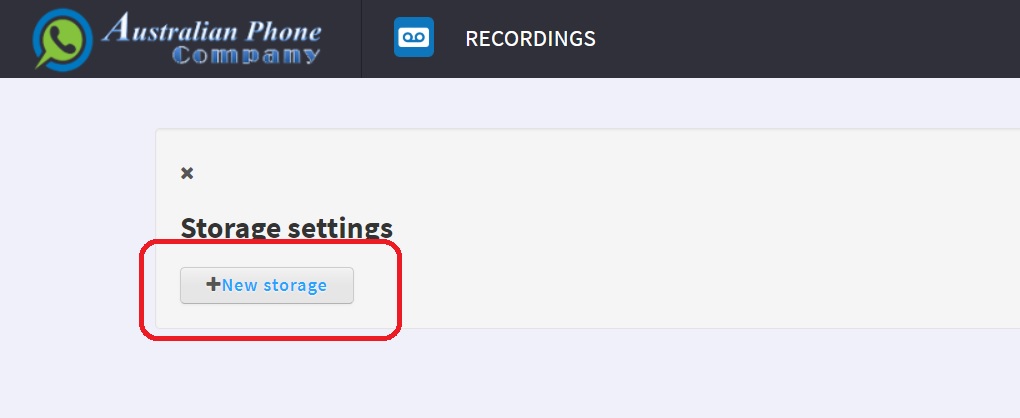
13. Inside "Storage App" Click on "Settings", click +New Storage
- Storage name: Any name that you would like for your storage
- Bucket name: an exact bucket name from S3
- Key: Access key ID from S3 User's
- Secret: Secret access key from S3 User's
- Set "Use By Default'
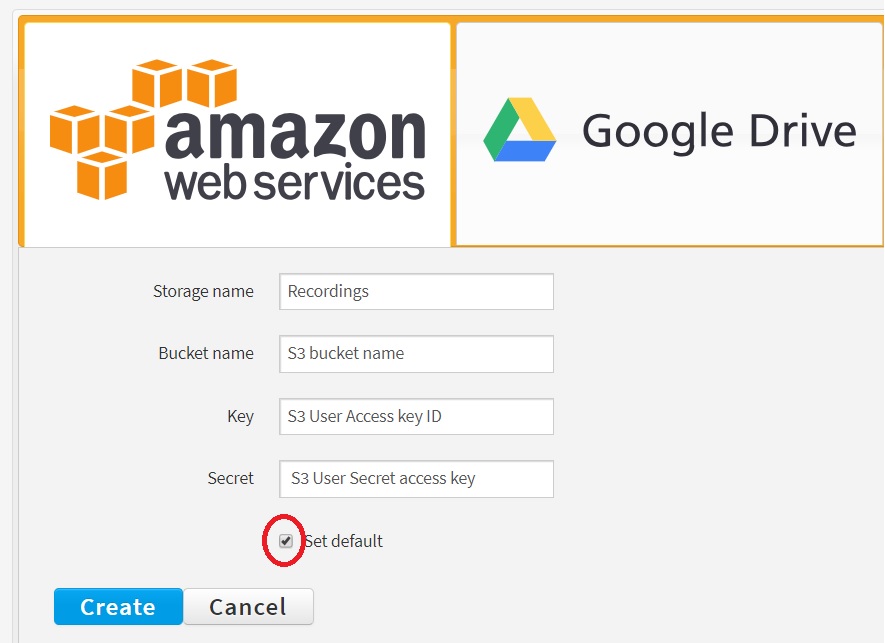
14. Click "Create" and all done, storage is yours.
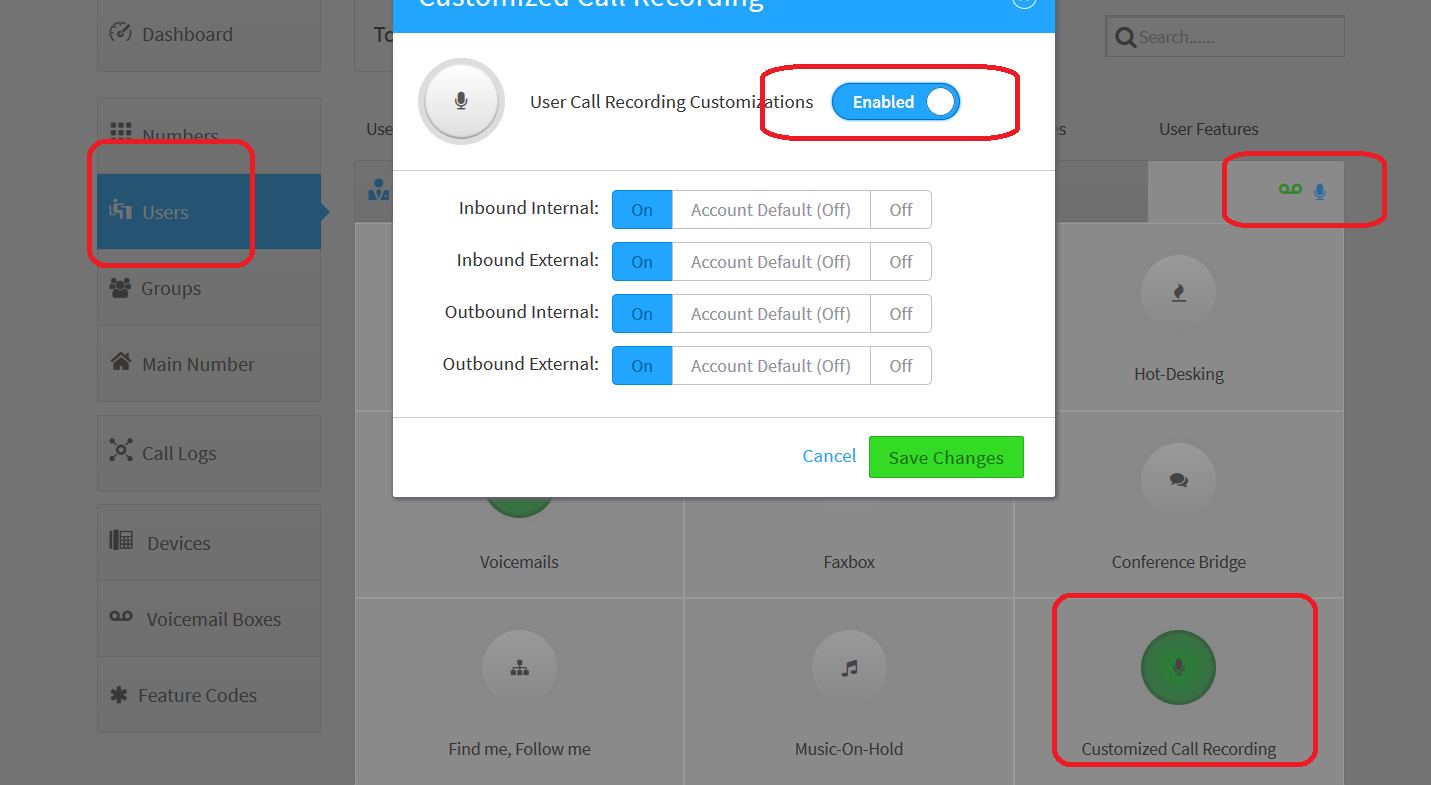
15. Now you may enable Call Recordings in User's properties and all conversations will be recorded and stored in Amazon S3. Please see the picture below:
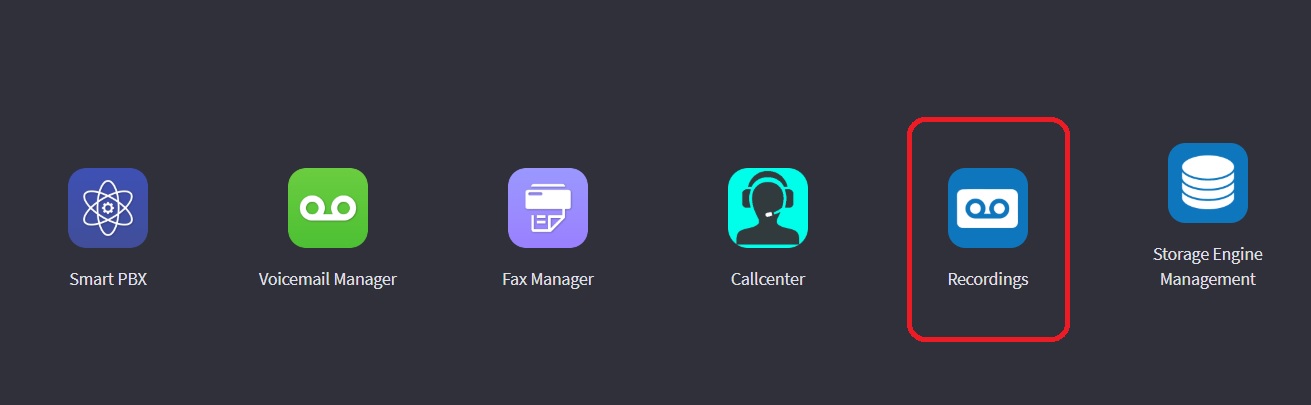
16. You may access recordings at any time via Cloud PBX "Recordings App" or download/manage straight via S3 services from Amazon portal. Please see the picture below: