


Gigaset A510 VoIP SIP IP DECT Phone configuration manual
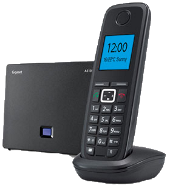
The Gigaset A510 and C610 IP phones are fitting solutions if you are looking for the choice of either VoIP or fixed line and convenience of using cordless handset. With DECT support these devices give you ability to place upward of 3 parallel calls.
Full user manual is available for download from here
- Before configuration you need to have an active account with us.
- Make sure, that your Phone is connected to electricity, Ethernet and switched on. Please wait till phone is fully loaded and ready.
- Find out your phone internal IP address. To check IP address press paging button on the face of base station, please see screen shot below:
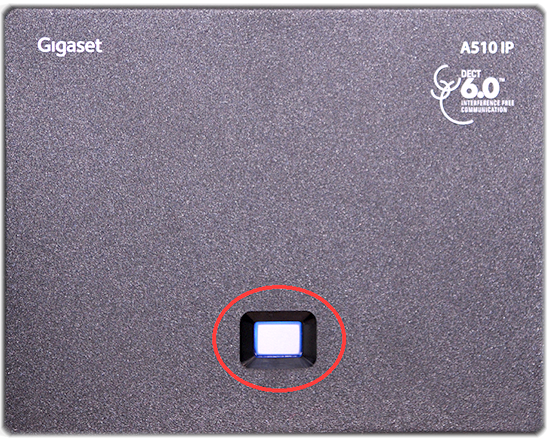
- Once pressed, IP address of the base station should be dispayed on handset:

- Use a computer from the same network, type in internet browser:
- Enter URL = “http://Phone IP address/”
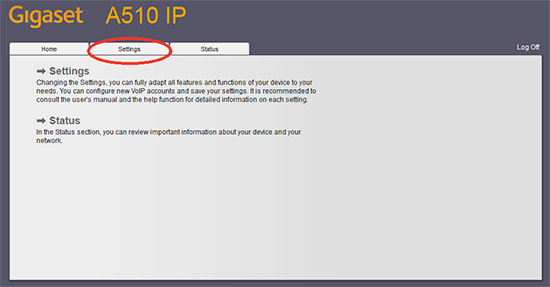
- Next page should appear:
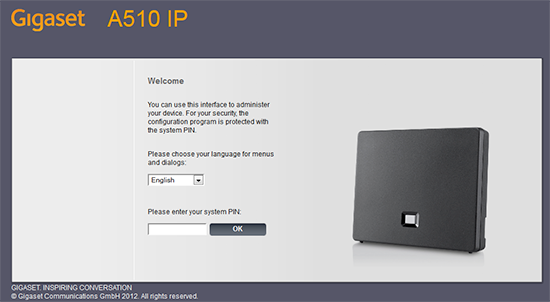
- Enter your system PIN for the A510 IP on the given field. The default PIN for the A510 IP is 0000
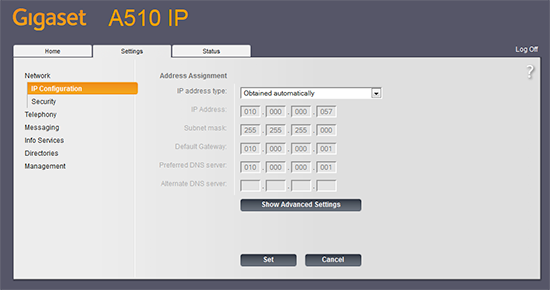
- You should see next screen after that:
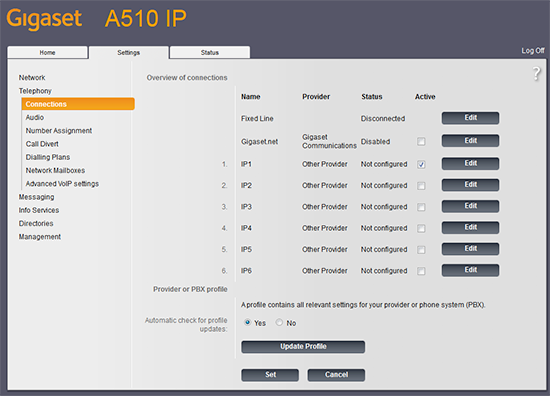
- Under Settings click on Telephony link in the left side menu:
- Select the first available line, indicated by "Not Configured" status:
Please check here how to configure for Residential VoIP
- Check your device credentials via MY ACCOUNT portal > Personal details > Devices
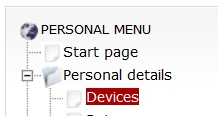
- Your login/password are coming from MY ACCOUNT portal > Personal details > Devices:

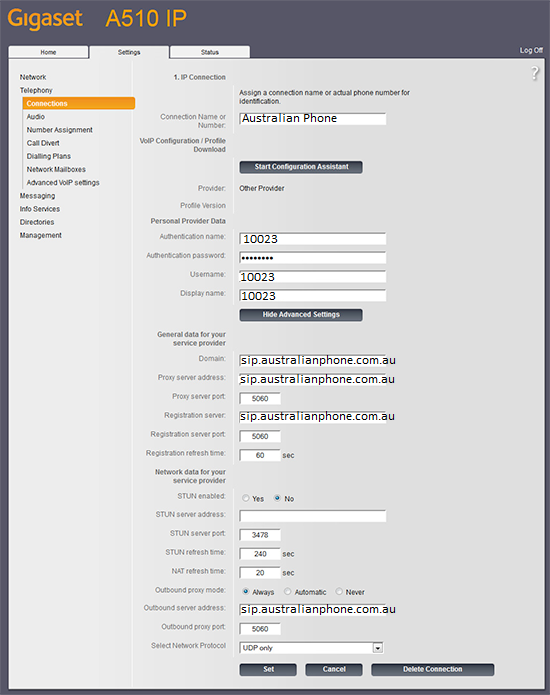
- After that click on "Show Advanced Settings" button and use the following settings:
Connection Name or Number:
Australian Phone
Authentication name:
Enter your device username (10023 in an example above)
Authentication password:
Use password from your device credentials, see above
Username:
Enter your device username (10023 in an example above)
Display name:
Enter your device username (10023 in an example above)
DNS SRV Lookup
Lookup Enabled (Only if your phone has this option)
Domain:
sip.australianphone.com.au
Proxy server address:
sip.australianphone.com.au
Proxy server port:
5060
Registration server:
sip.australianphone.com.au
Registration server port:
5060
Registration refresh time:
60
STUN enabled:
No
STUN server address:
Outbound proxy mode:
Always
Outbound server address:
sip.australianphone.com.au
Outbound proxy port:
5060
Select Network Protocol:
UDP
- Click Set, your configuration should look similar to picture below:
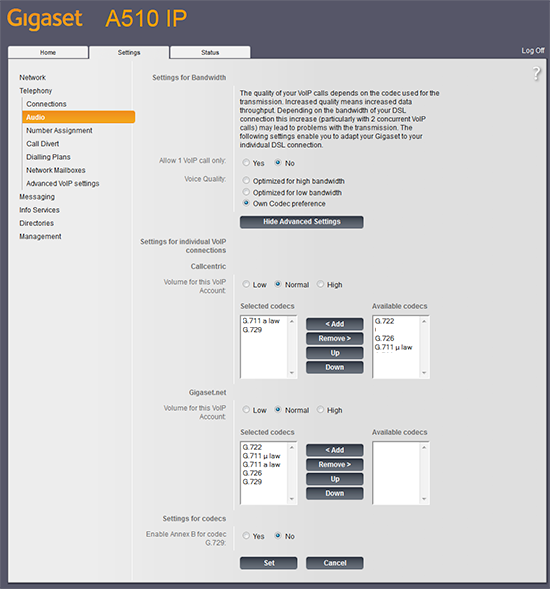
- Next, audio settings should be done for Australian standards. To do this click on Audio followed by Show Advanced Settings button and ensure that G.711a and G.729 codecs are only codecs listed under Selected Codecs option. Once done, click the Set button to save your changes.
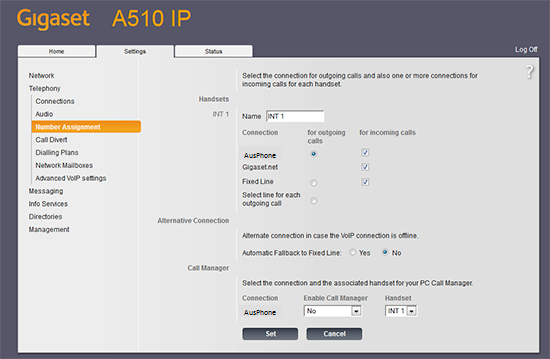
- To receive calls properly you need to configure your Gigaset IP phone. Click on Number Assignment link, and ensure that both the radio button and the check box have been marked for the settings for outgoing calls and for incoming calls next to Australian Phone, as shown below:
- You may want to have an access to voice mail. From the left side menu visit the Network Mailboxes page. In the field next to Australian Phone enter 09003 and mark checkbox as Active
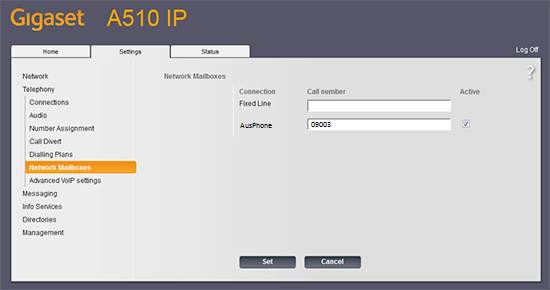
- Once done click on Set button.
- Your phone is ready to use.
- Make a free 09002 test call
Please check here how to configure for Cloud PBX
- Login into Cloud PBX Portal.
- Create a SIP softphone device if you don't have any spare: How to create Device in Cloud PBX
- Navigate to "Devices". Click tool button on the right of required Device to see credentials.
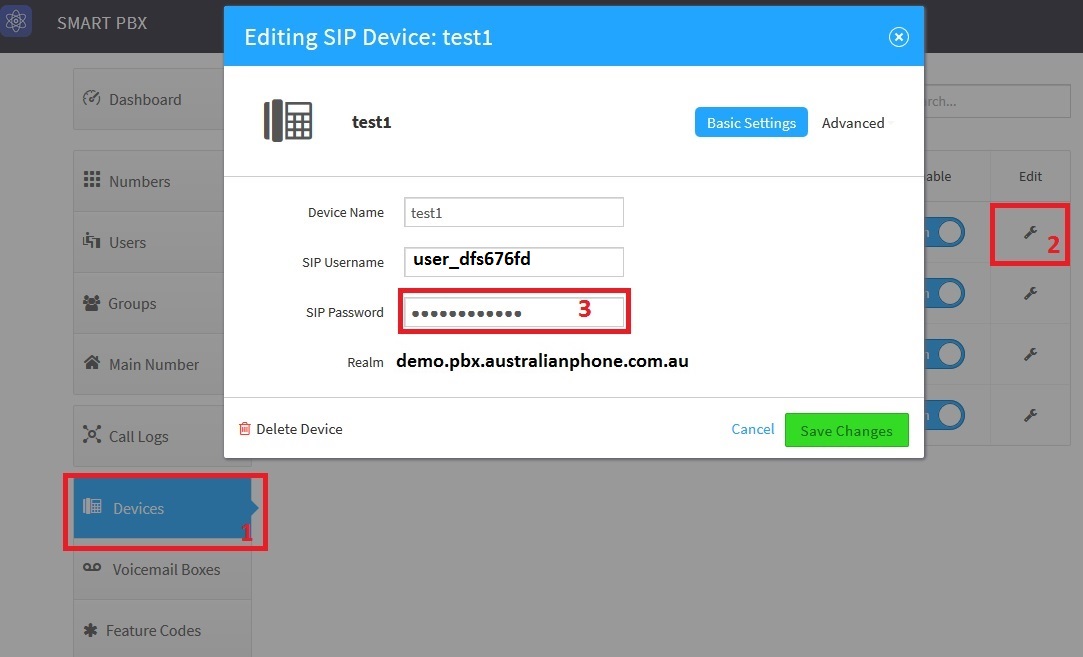
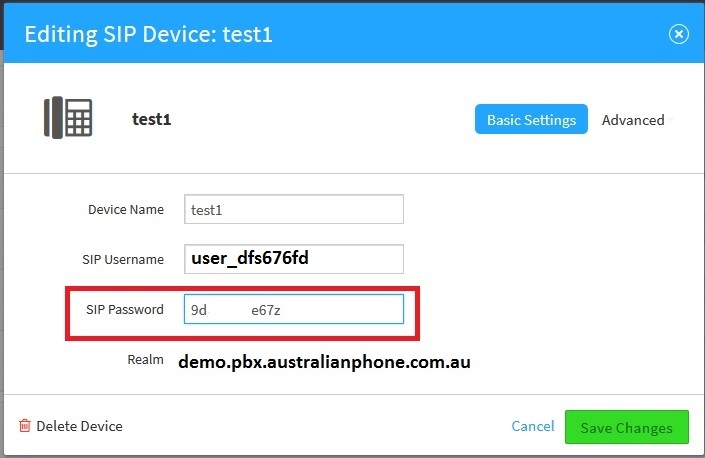
Your SIP Username, Password and Realm will be displayed:
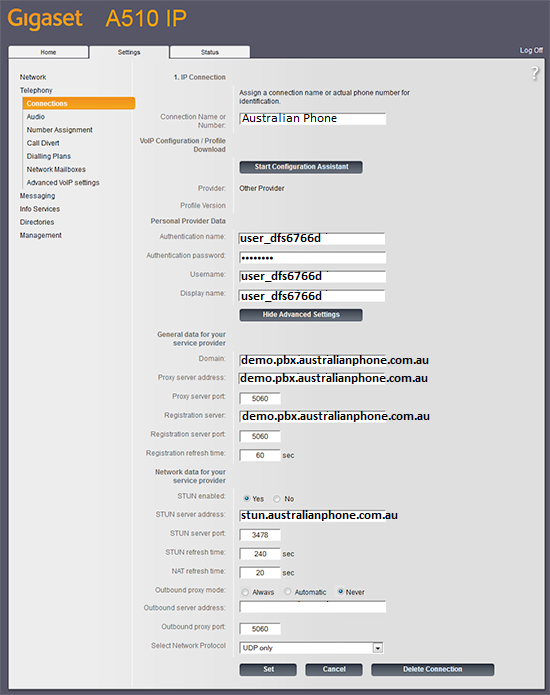
- After that click on "Show Advanced Settings" button and use the following settings:
Connection Name or Number:
Australian Phone
Authentication name:
Enter your SIP Username from device (user_dfs6766d in an example above)
Authentication password:
Use SIP password from your device settings, see above
Username:
Enter your SIP Username from device (user_dfs6766d in an example above)
Display name:
Enter your SIP Username from device (user_dfs6766d in an example above)
DNS SRV Lookup
Lookup Enabled (Only if your phone has this option)
Domain:
Realm from Device settings (demo.pbx.australianphone.com.au), see above
Proxy server address:
Realm from Device settings (demo.pbx.australianphone.com.au), see above
Proxy server port:
5060
Registration server:
Realm from Device settings (demo.pbx.australianphone.com.au), see above
Registration server port:
5060
Registration refresh time:
60
STUN enabled:
Yes
STUN server address:
stun.australianphone.com.au
Outbound proxy mode:
Never
Outbound server address:
Outbound proxy port:
5060
Select Network Protocol:
UDP
- Click Set, your configuration should look similar to picture below:
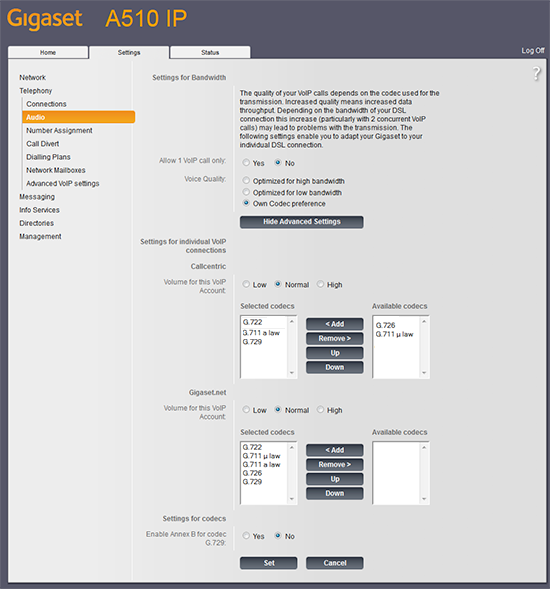
- Next, audio settings should be done for Australian standards. To do this click on Audio followed by Show Advanced Settings button and ensure that G.722 (on the top), G.711a (next one) and G.729 (the last) codecs are only codecs listed under Selected Codecs option. Once done, click the Set button to save your changes.
- To receive calls properly you need to configure your Gigaset IP phone. Click on Number Assignment link, and ensure that both the radio button and the check box have been marked for the settings for outgoing calls and for incoming calls next to Australian Phone, as shown below:
- You may want to have an access to voice mail. From the left side menu visit the Network Mailboxes page. In the field next to Australian Phone enter *98 and mark checkbox as Active
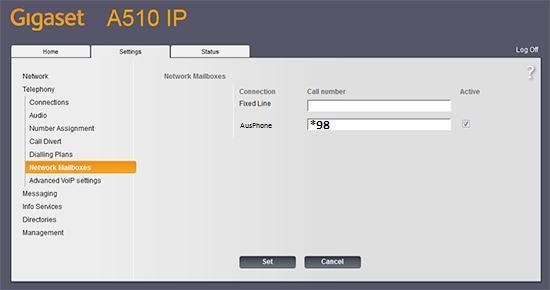
- Once done click on Set button.
- Your phone is ready to use.
- Make a free 09002 test call