Yealink SIP VoIP Phone configuration manual
The full user manual is available for download from here
- Before configuration, you need to have an active account with us.
- If you don't have a phone, you may purchase it here: Buy Yealink Phones here
- Make sure, that your phone is connected to electricity, Ethernet and switched on. Please wait till phone is fully loaded and ready.
- Find out your phone internal IP address. To check IP address press OK button and write down the IP address. It looks something like 192.168.0.20
- User a computer with an internet browser. Enter URL = http://Phone IP address
- User name = admin
- Password = admin
Please check here how to configure for Residential VoIP
- Check your device credentials via MY ACCOUNT portal > Personal details > Devices
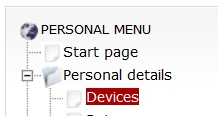
- Your login/password are coming from MY ACCOUNT portal > Personal details > Devices:

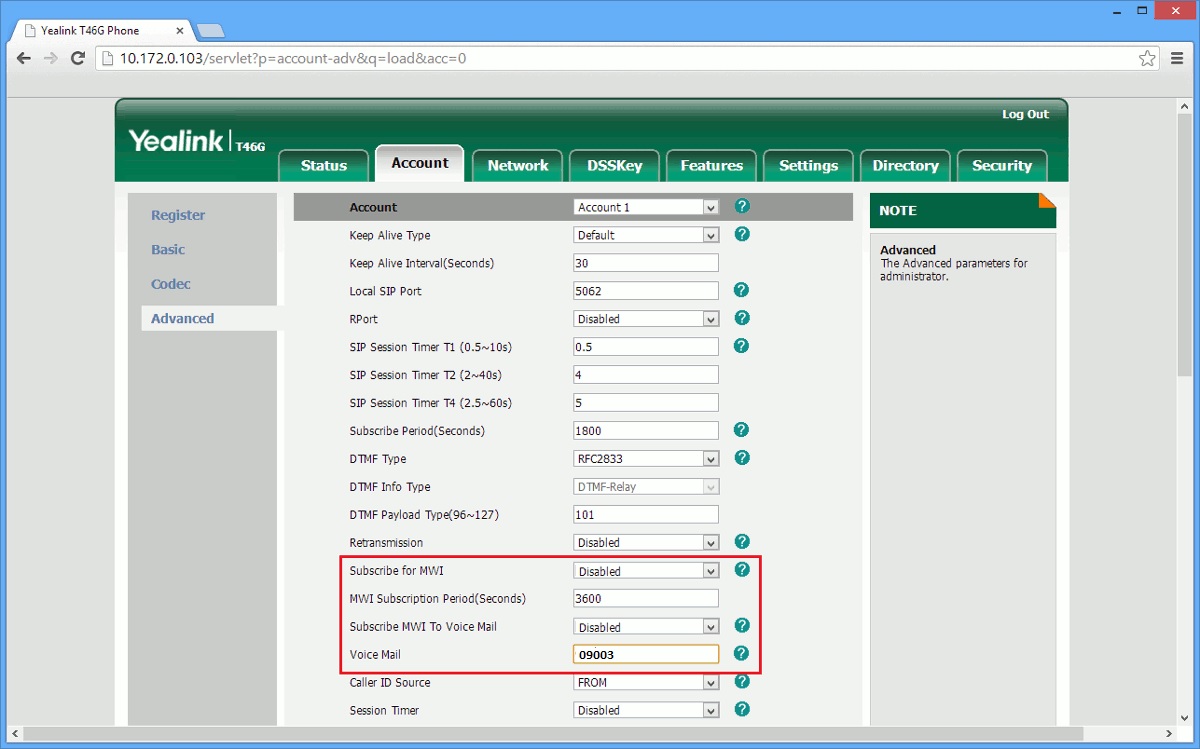
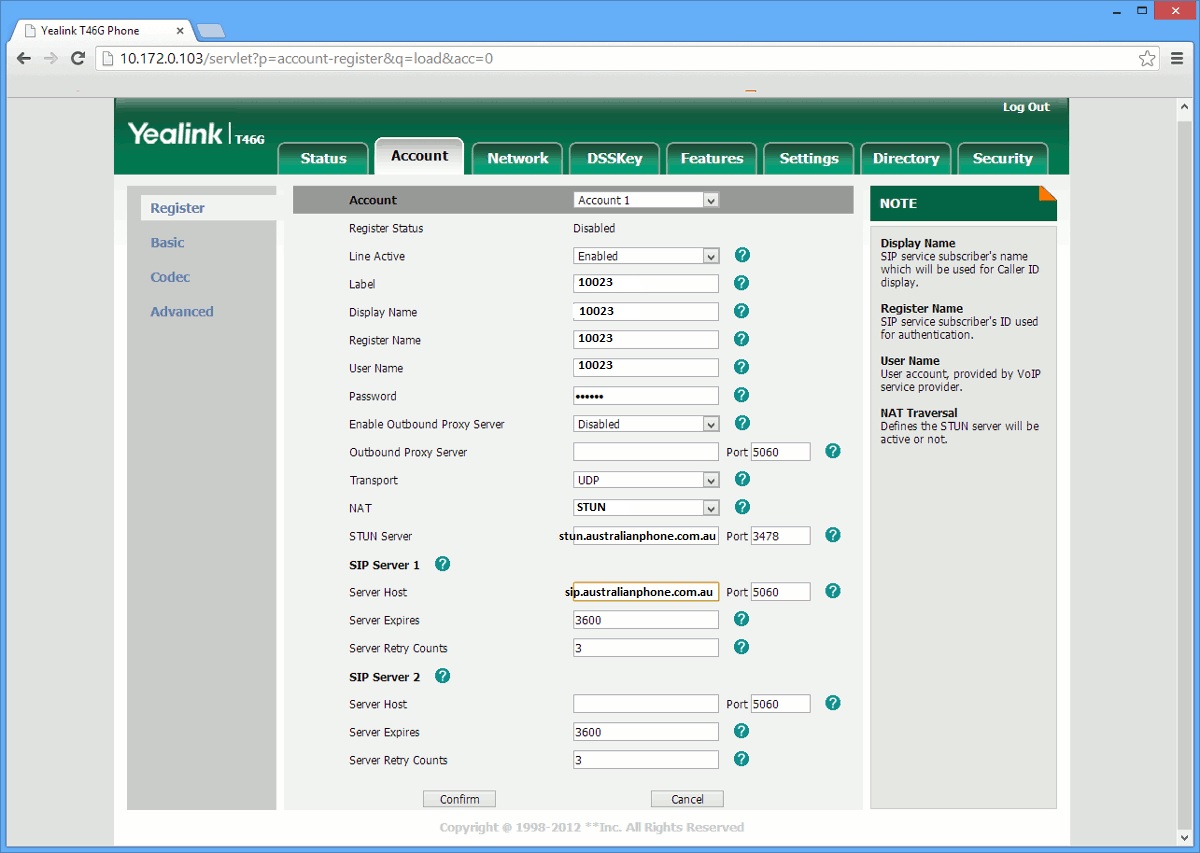
- Select Accounts > Account 1
-
-
- Set Line Active "Enabled"
- Set Label - your device Username (10023 as from example)
- Set Display Name - your device Username (10023 as from example)
- Set Register Name - your device Username (10023 as from example)
- Set User Name - your device Username (10023 as from example)
- Authenticate password from Personal details > Devices > Password
- Select NAT: "STUN"
- Enter STUN Server: stun.australianphone.com.au
- You need to define SIP Server 1 address Server Host: sip.australianphone.com.au
- Click Confirm
- Cick on "Codecs" on the left
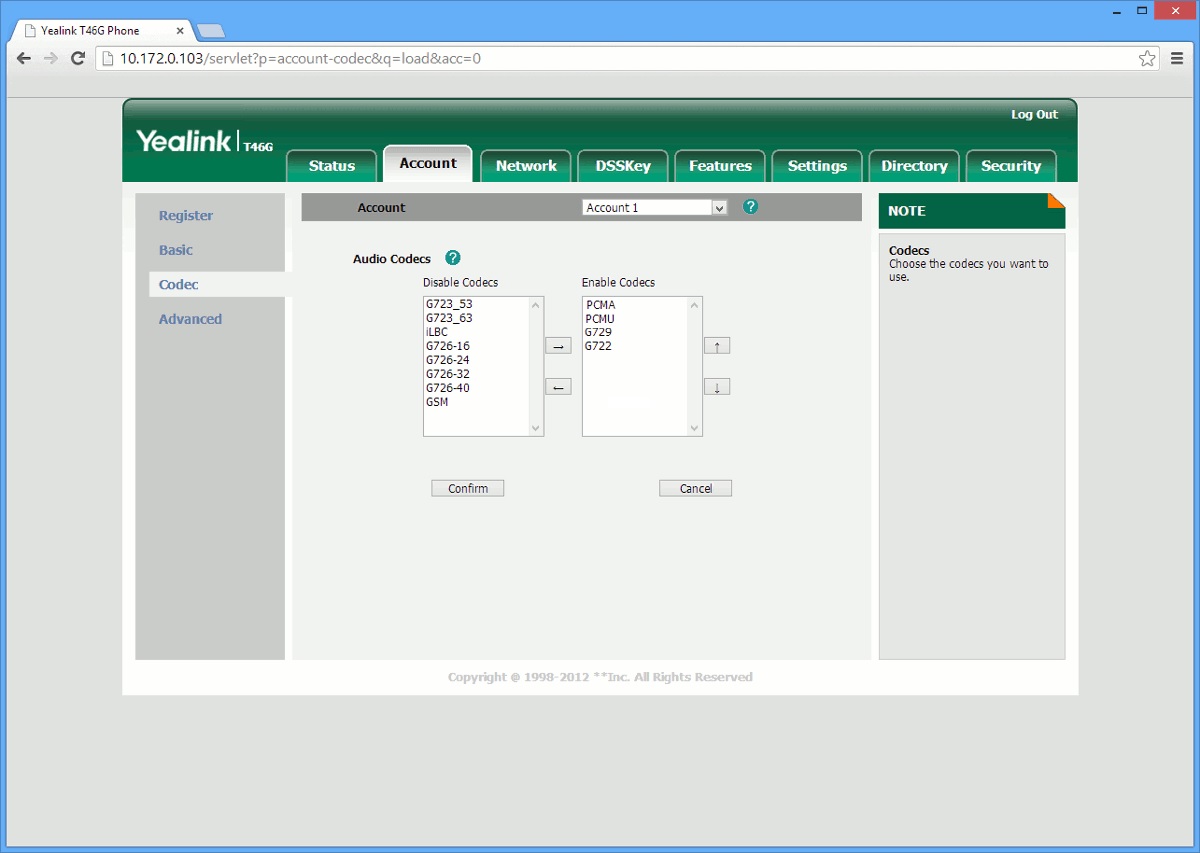
- Set codec order: PCMA, PCMU, G729, G722
- Click Confirm
- Now your phone should display "Registered" status on account page
- Make a free 09002 test call
Please check here how to configure for Cloud PBX
Please NOTE: Cloud PBX Supports Auto provisioning for Yealink phones, please check here how to use Auto Provisioning that may save you time to avoid mannual configuration: How to Use Auto Provisioning in Cloud PBX
Manual Configuration:
- Login into Cloud PBX Portal.
- Create a SIP softphone device if you don't have any spare: How to create Device in Cloud PBX
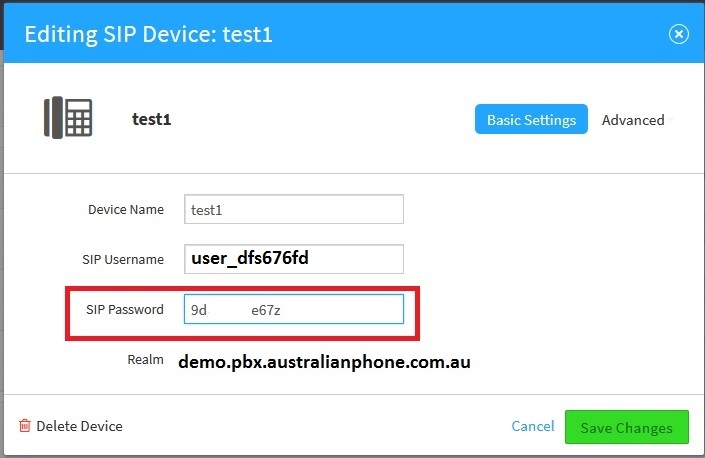
- Navigate to "Devices". Click tool button on the right of required Device to see credentials.
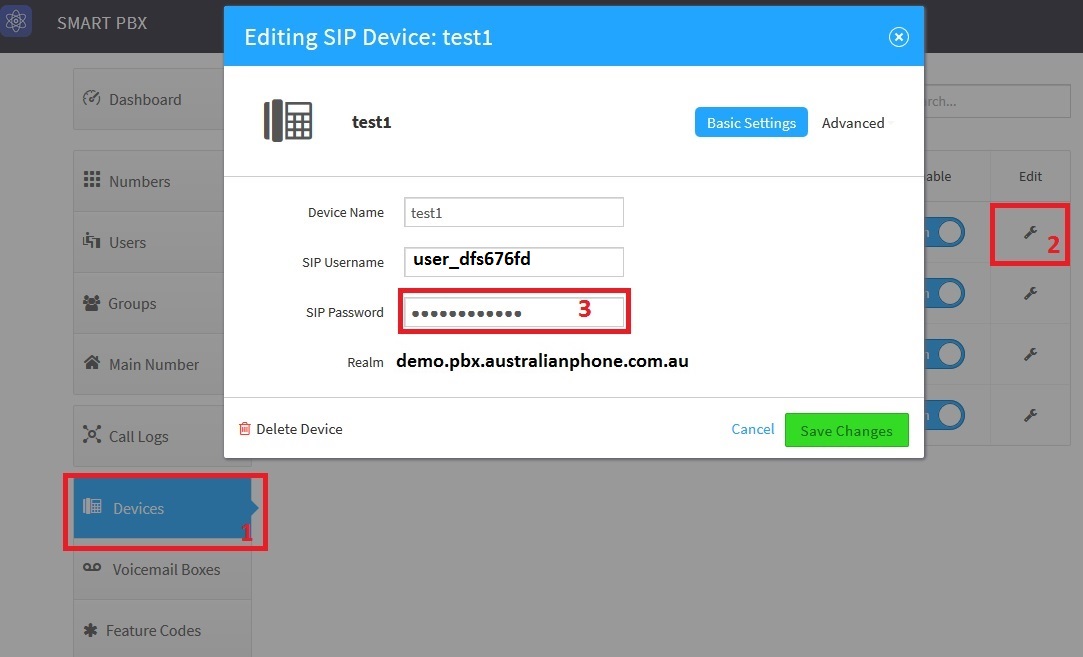
- Your SIP Username, Password and domain will be displayed:
- Select Accounts > Account 1
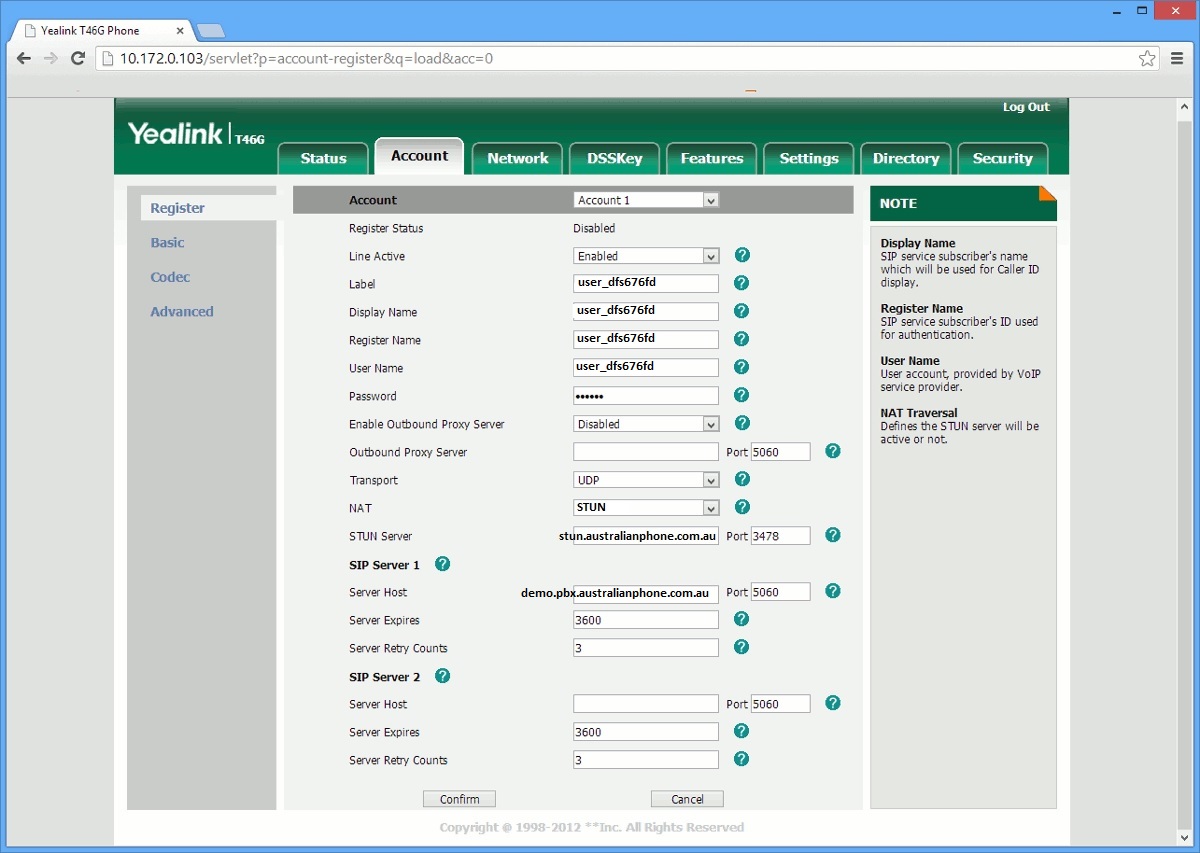
-
-
- Set Line Active "Enabled"
- Set Label - your device SIP Username (user_dfs6766d in example)
- Set Display Name - your device SIP Username (user_dfs676fd in example)
- Set Register Name - your device SIP Username (user_dfs676fd in example)
- Set User Name - your device SIP Username (user_dfs676fd in example)
- Authenticate password from device SIP Password > Password
- Select NAT: "STUN"
- Enter STUN Server: stun.australianphone.com.au
- You need to define SIP Server 1 address Server Host as your device Realm (demo.pbx.australianphone.com.au in example)
- Click Confirm
- Cick on "Codecs" on the left
- Set codec order: G722, PCMA, PCMU, G729
- Click Confirm
- Now your phone should display "Registered" status on account page
- Make a free 09002 test call